Archive | mars, 2020

Data-in-Transit Encryption with MariaDB

Sécuriser les données au repos c’est important, mais sécuriser les flux l’est tout autant.

Donc, après une petite synthèse sur Data-at-Rest Encryption avec Transparent Data Encryption, voyons comment mettre un peu de confidentialité dans le transport.

Un peu de cuisine pour commencer … En ces temps de confinement, cet article servira de support à un TP que nous jouerons avec les LP DLIS de l’IUT de Vannes semaine prochaine.

On va ouvrir un accès sur une base MariaDB exposée sur Internet … ouais, on des fous 🙂

Bon, on va quand même avant toute chose activer les logs sur le fameux SGBD histoire de voir qui attaque sans passer par un proxy. Attention malgré tout car dans les fameux fichiers de logs on retrouve aussi en particulier, les requêtes de création de comptes avec si on n’y prends pas garde le mot de passe en clair (et accessoirement toutes les commandes pourries)  :
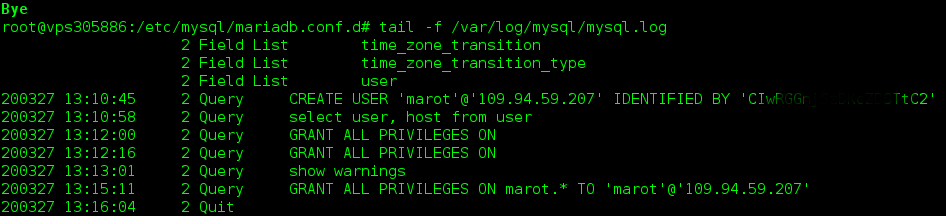
logs mariaDB

logs mariaDB

root@vpsxxxxxx:/etc/mysql/mariadb.conf.d# ls /var/log/mysql/mysql.log -lart
-rw-rw—- 1 mysql adm 182 Mar 27 11:56 /var/log/mysql/mysql.log


Pour faire les choses un petit peu sérieusement, on n’ouvrira qu’une base sur internet avec un seul compte dédié créé pour l’occasion, histoire d’avoir un peu de cloisonnement.

Forcément et heureusement, dans un premier temps ça ne passe pas. Il faut modifier la configuration par défaut qui n’autorise que les connexions depuis le poste local.

can't connect to mariaDB

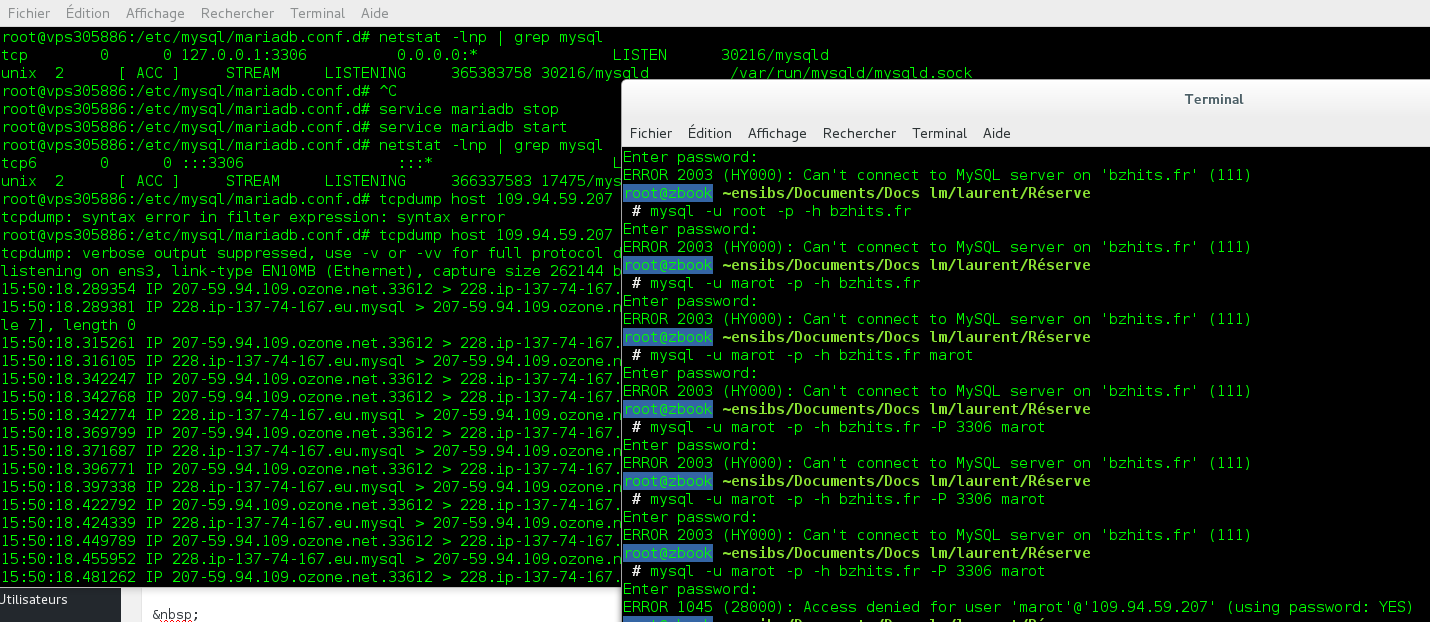
can’t connect to mariaDB


Et puis, après quelques efforts, la connexion peut enfin être établie…

mysql from everywher for everyone

mysql from everywher for everyone


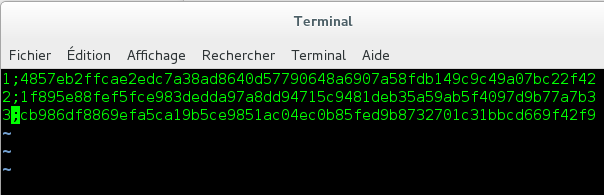
Faudrait pas croire que votre mot de passe circule en clair (contrairement au trafic suivant l’authentification) .

Il se dit que le mot de passe suivrait  le mécanisme de chiffrement détaillé ici  :

https://dev.mysql.com/doc/dev/mysql-server/latest/page_protocol_connection_phase_authentication_methods_native_password_authentication.html

Malheureusement, à cet instant (20200329151524) je n’arrive pas à retrouver dans mon pcap les 20 octets de nonce (on nous ment ?)
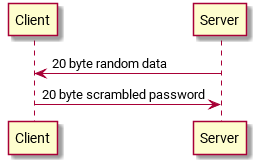
Scramble data

Scramble data


Bref, quoi, qu’il en soit et au delà de la vérification de l’implémentation de ce mécanisme, revenons au chiffrement du flux …

Etape 1 – Créer le certificat racine de l’autorité de certification (CA)


Créons un dossier tls dans le répertoire /etc/mysql/  (parce que ssl c’est tellement vingtième siècle):

$ cd /etc/mysql
$ sudo mkdir tls
$ cd tls

Note: La valeur du Common Name (CN) utilisée pour les certificats serveur MariaDB et le client doivent être différents du Common Name utilisé pour le certificat racine de l’autorité de certification. Pour éviter tour problème, j’ai utilisé les valeurs suivantes :
Common Name de la CA : MariaDB admin
Common Name du serveur : MariaDB server
Common Name du client : MariaDB client

Dans la vraie vie, la CA serait hébergée sur une autre machine.

Génération de la paire de clefs RSA

$ sudo openssl genrsa 2048 > BZHITSCA-key.pem

Génération du certificat de la clef publique ( tip : pour être très précis, on parle donc de certificat DE clef publique)

$ sudo openssl req -new -x509 -nodes -days 365000 -key BZHITSCA-key.pem -out BZHITSCA-cert.pem

On lui donne une validité de 1 000 ans, ce qui nous donnera le temps de jouer.


Par abus de langage on associe souvent la commande précédente à une simple génération de clef privée. Mais en fait le fichier .pem produit permet aussi d’exporter la clef publique.

$ sudo openssl rsa -in BZHITSCA-key.pem -pubout -out BZHITSCA-pubkey.pem

Etape 2 – Créer le certificat du serveur MariaDB

Génération de la clef et de la Certificate Signing Request

$ sudo openssl req -newkey rsa:2048 -days 365 -nodes -keyout SERVER-key.pem -out SERVER-req.pem

Le deuxième objet créé est la requête de demande de signature de certificat (Certificate Signing Request = CSR). Donc, généralement on peut dire qu’un certificat c’est un fichier contenant des « informations » relatives à une entité et la clef publique de cette même entité ayant subi une signature numérique par l’autorité de certification (qui certifie donc que la clef publique représente bien l’entité en question). Capito ?

Export de la clef RSA

$ sudo openssl rsa -in SERVER-key.pem -out SERVER-key.pem

Signature du certificat du serveur

$ sudo openssl x509 -req -in SERVER-req.pem -days 365000 -CA BZHITSCA-cert.pem -CAkey BZHITSCA-key.pem -set_serial 01 -out SERVER-cert.pem

Etape 3 – Générer les certificats du client

Génération de la clef et de la Certificate Signing Request

$ sudo openssl req -newkey rsa:2048 -days 365 -nodes -keyout SERVER-key.pem -out SERVER-req.pem

Le deuxième objet créé est la requête de demande de signature de certificat (Certificate Signing Request = CSR). Donc, généralement on peut dire qu’un certificat c’est un fichier contenant des « informations » relatives à une entité et la clef publique de cette même entité ayant subi une signature numérique par l’autorité de certification (qui certifie donc que la clef publique représente bien l’entité en question). Capito ?

Export de la clef RSA

$ sudo openssl rsa -in SERVER-key.pem -out SERVER-key.pem

Signature du certificat du serveur

$ sudo openssl x509 -req -in SERVER-req.pem -days 365000 -CA BZHITSCA-cert.pem -CAkey BZHITSCA-key.pem -set_serial 01 -out SERVER-cert.pem

Etape 4 – Copier les certificats sur le client

Configuration du client

mkdir /etc/mysql/client-ssl && cd /etc/mysql/client-ssl

# Copy the following files: CLIENT-cert.pem, CLIENT-key.pem and BZHITSCA-cert.pem
scp root@REMOTE_SERVER_IP:~/cert/{client-cert.pem,client-key.pem,ca-cert.pem} ./

chmod -R 700 /etc/mysql/client-ssl

Editer my.cnf pour configurer les chemins vers les certificats:

nano /etc/mysql/my.cnf

et ajouter:

[client]
ssl-ca =   /etc/mysql/client-ssl/ca-cert.pem
ssl-cert = /etc/mysql/client-ssl/client-cert.pem
ssl-key =  /etc/mysql/client-ssl/client-key.pem


Etape 5 – Configurer le serveur MariaDB

Editer  le fichier /etc/mysql/mariadb.conf.d/50-server.cnf ou bien /etc/mysql/mariadb.cnf comme suit:

$ sudo vi /etc/mysql/mariadb.conf.d/50-server.cnf

Ajouter dans le bloc [mysqld]:

### MySQL Server ###
## Securing the Database with ssl option and certificates ##
## There is no control over the protocol level used. ##
##  mariadb will use TLSv1.0 or better.  ##
ssl
ssl-ca=/etc/mysql/ssl/ca-cert.pem
ssl-cert=/etc/mysql/ssl/server-cert.pem
ssl-key=/etc/mysql/ssl/server-key.pem

Savegarder le fichier etredémarrer mariadb :
$ sudo /etc/init.d/mysql restart

Etape 6 – Créer un nouvel utilisateur et se connecter


CREATE USER 'secure_user'@'%' IDENTIFIED BY 'my_password';
GRANT ALL PRIVILEGES ON votre_base.* TO securee_user@'%' REQUIRE SSL;
FLUSH PRIVILEGES;


Vous pouvez alors en principe vous connecter avec TLS:

mysql -h REMOTE_SERVER_IP -u remote_user -p"my_password"
Welcome to the MariaDB monitor.  Commands end with ; or \g.
Your MariaDB connection id is 5
Server version: 10.1.26-MariaDB-0+deb9u1 Debian 9.1

Copyright (c) 2000, 2017, Oracle, MariaDB Corporation Ab and others.

Type 'help;' or '\h' for help. Type '\c' to clear the current input statement.

MariaDB [(none)]> Bye


Pour mémoire (pas mal de liens qui m’ont permis de comprendre) :

https://stackoverflow.com/questions/38167587/how-to-use-wireshark-to-capture-mysql-query-sql-clearly

How to get the network packets between MySQL client and server?


tcpdump -nnei any port 3306 -w tmp.pcap
https://dev.mysql.com/doc/dev/mysql-server/latest/page_protocol_connection_phase_authentication_methods_native_password_authentication.html

http://databaseblog.myname.nl/2017/03/network-attacks-on-mysql-part-1.html

https://www.cyberciti.biz/faq/how-to-setup-mariadb-ssl-and-secure-connections-from-clients/

https://www.gab.lc/articles/mysql_with_ssl/
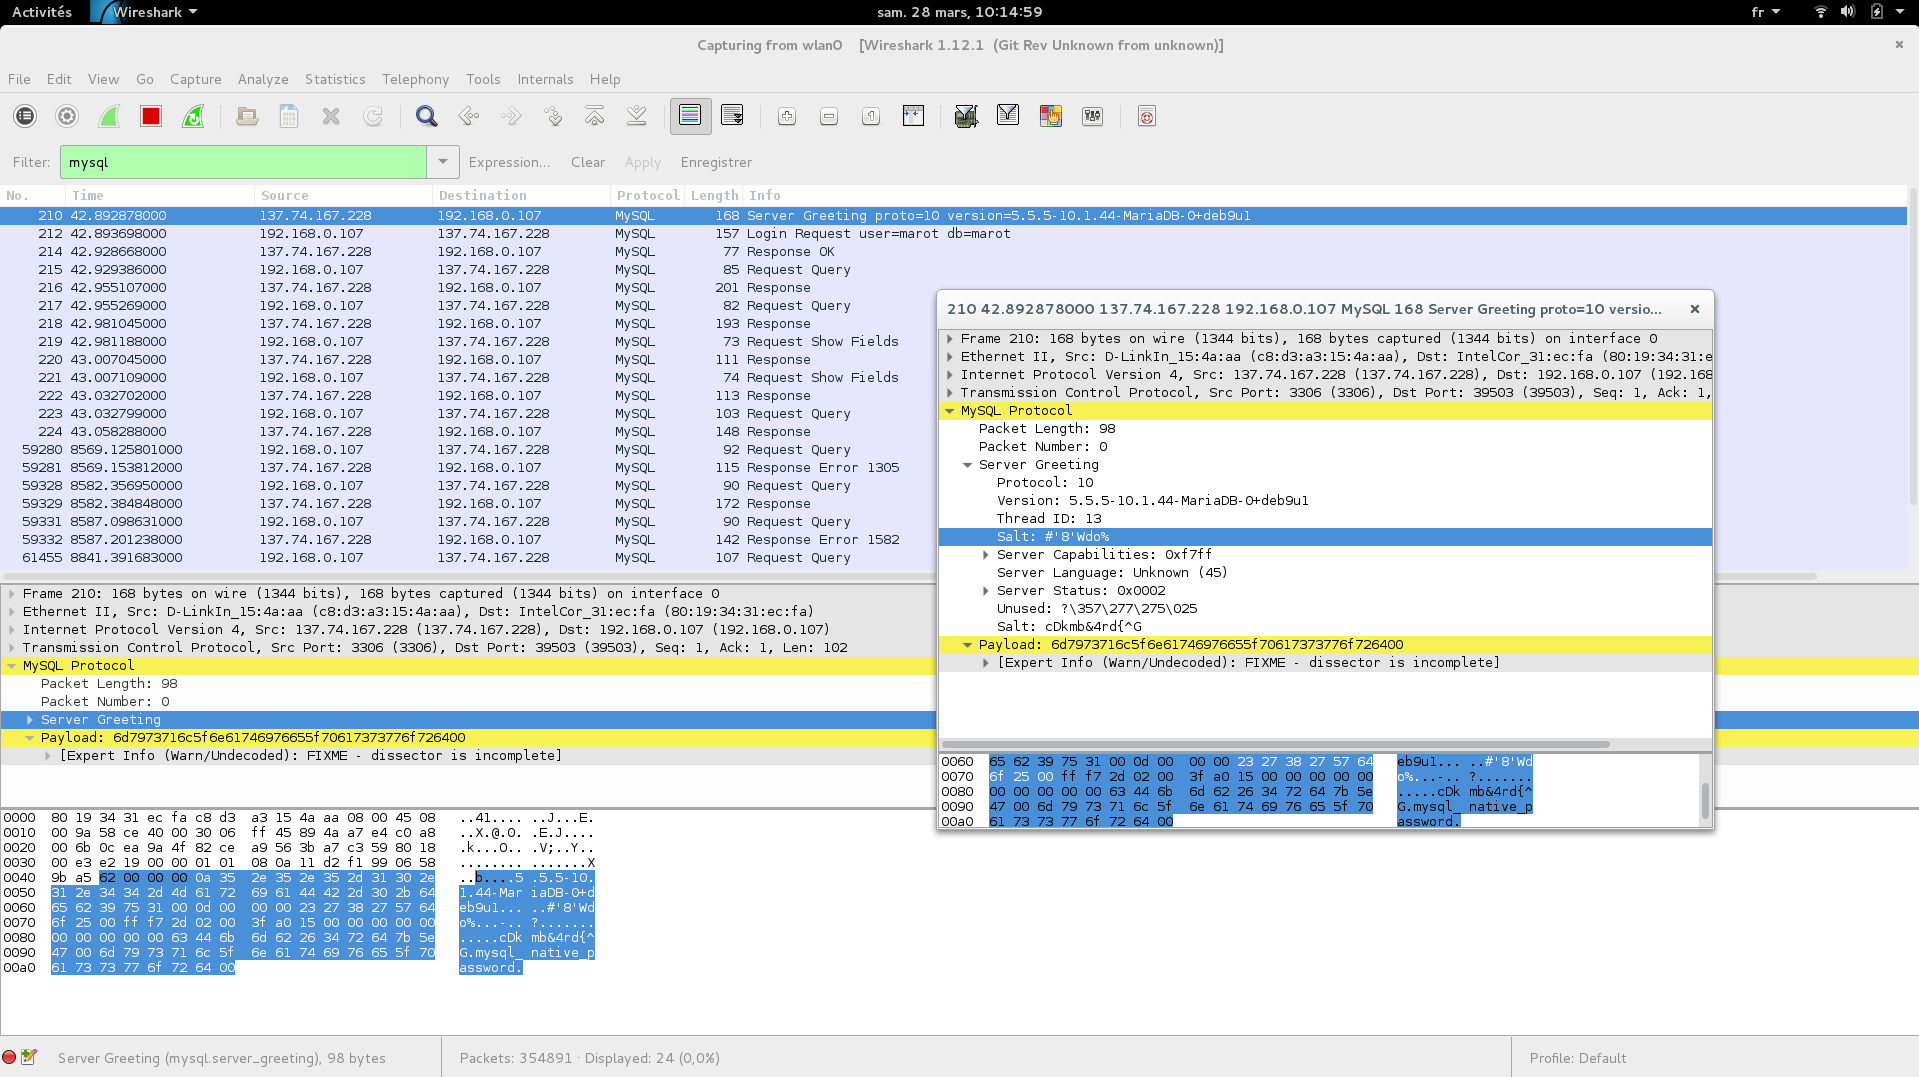
capture wireshark

capture wireshark

Posted in Boulot0 commentaire

Improve you chinese …

Pour occuper cette période un peu particulière de confinement COVID-19 et alimenter quelques menus TPs, je me lance dans la grande aventure de la tentative de compréhension d’InnoDB.

Si j’avais eu un peu de courage, je me serais remis à Ruby et j’aurais étudié les excellents travaux de Jeremy Cole https://blog.jcole.us/innodb/ mais vu que des chinois sympathiques semblent avoir porté son travail en java , let’s go !!

Jusqu’à la semaine dernière, utilisateur-amateur de MariaDB, je ne m’étais même jamais posé de questions sur les types de backend de mon SGBD. Je faisais juste le malin en allant lire vos tables à partir des fichiers MYD avec un pauvre éditeur hexadécimal.

J’ai donc téléchargé le dernier build du client innodb-java-reader et …

Bon, pour l’instant, on ne va pas se cacher, ça ne se passe pas très bien 🙂

 alibaba / innodb-java-reader

alibaba /
innodb-java-reader

[2020-03-28] Puis après quelques échanges par mail avec Xu, nous avons fini par découvrir un bug lié à ma config (bon c’est sûr quand tu bosse sous windows pasr ce que ta Debian est bridée sur Java 7 …) .

Read your data ...

Read your data …

Je rappelle que l’objectif reste de pouvoir aller lire les fichiers InnoDB sans passer par le moteur MariaDB afin de démontrer la pertinence du chiffrement.

Posted in Boulot0 commentaire

Data-at-Rest Encryption with MariaDB

Data-at-Rest Encryption Overview


Source  : https://mariadb.com/kb/en/file-key-management-encryption-plugin/

Encryption of tables and tablespaces was added in MariaDB 10.1.3.

Having tables encrypted makes it almost impossible for someone to access or steal a hard disk and get access to the original data. MariaDB got Data-at-Rest Encryption with MariaDB 10.1. This functionality is also known as « Transparent Data Encryption (TDE) ».

This assumes that encryption keys are stored on another system.

Using encryption has an overhead of roughly 3-5%.

MariaDB encryption is fully supported for the XtraDB and InnoDB storage engines. Encryption is also supported for the Aria storage engine, but only for tables created with ROW_FORMAT=PAGE (the default), and for the binary log (replication log).

MariaDB allows the user to configure flexibly what to encrypt. In XtraDB or InnoDB, one can choose to encrypt:

  • everything — all tablespaces (with all tables)
  • individual tables
  • everything, excluding individual tables

Additionally, one can choose to encrypt XtraDB/InnoDB log files (recommended).

MariaDB’s data-at-rest encryption requires the use of a key management and encryption plugin. These plugins are responsible both for the management of encryption keys and for the actual encryption and decryption of data.

MariaDB supports the use of multiple encryption keys. Each encryption key uses a 32-bit integer as a key identifier. If the specific plugin supports key rotation, then encryption keys can also be rotated, which creates a new version of the encryption key.

How MariaDB manages encryption keys depends on which encryption key management solution you choose. Currently, MariaDB has three options:

File Key Management Plugin

The File Key Management plugin that ships with MariaDB is a basic key management and encryption plugin that reads keys from a plain-text file. It can also serve as example and as a starting point when developing a key management plugin.

For more information, see File Key Management Plugin.

AWS Key Management Plugin

The AWS Key Management plugin is a key management and encryption plugin that uses the Amazon Web Services (AWS) Key Management Service (KMS). The AWS Key Management plugin depends on the AWS SDK for C++, which uses the Apache License, Version 2.0. This license is not compatible with MariaDB Server’s GPL 2.0 license, so we are not able to distribute packages that contain the AWS Key Management plugin. Therefore, the only way to currently obtain the plugin is to install it from source.

For more information, see AWS Key Management Plugin.

Eperi Key Management Plugin

The Eperi Key Management plugin is a key management and encryption plugin that uses the eperi Gateway for Databases. The eperi Gateway for Databases stores encryption keys on the key server outside of the database server itself, which provides an extra level of security. The eperi Gateway for Databases also supports performing all data encryption operations on the key server as well, but this is optional.

For more information, see Eperi Key Management Plugin.


File Key Management Encryption Plugin


The File Key Management plugin that ships with MariaDB is a key management and encryption plugin that reads encryption keys from a plain-text file.

The File Key Management plugin is the easiest key management and encryption plugin to set up for users who want to use data-at-rest encryption. Some of the plugin’s primary features are:

  • It reads encryption keys from a plain-text key file.
  • As an extra protection mechanism, the plain-text key file can be encrypted.
  • It supports multiple encryption keys.
  • It does not support key rotation.
  • It supports two different algorithms for encrypting data.

It can also serve as an example and as a starting point when developing a key management and encryption plugin with the encryption plugin API.

The File Key Management plugin is included in MariaDB packages as the file_key_management.so or file_key_management.dll shared library. The shared library is in the main server package, so no additional package installations are necessary.

Although the plugin’s shared library is distributed with MariaDB by default, the plugin is not actually installed by MariaDB by default. The plugin can be installed by providing the --plugin-load or the --plugin-load-add options. This can be specified as a command-line argument to mysqld or it can be specified in a relevant server option group in an option file. For example:

[mariadb]
...
plugin_load_add = file_key_management


The default MariaDB option file is called my.cnf on Unix-like operating systems and my.ini on Windows. Depending on how you’ve installed MariaDB, the default option file may be in a number of places, or it may not exist at all.

In order to encrypt your tables with encryption keys using the File Key Management plugin, you first need to create the file that contains the encryption keys. The file needs to contain two pieces of information for each encryption key. First, each encryption key needs to be identified with a 32-bit integer as the key identifier. Second, the encryption key itself needs to be provided in hex-encoded form. These two pieces of information need to be separated by a semicolon.

$ sudo openssl rand -hex 32 >> /etc/mysql/encryption/keyfile


The key file still needs to have a key identifier for each encryption key added to the beginning of each line. Key identifiers do not need to be contiguous. Open the new key file in your preferred text editor and add the key identifiers. For example, the key file would look something like the following after this step:

If the key file is unencrypted, then the File Key Management plugin only requires the file_key_management_filename system variable to be configured.


[mariadb]
...
loose_file_key_management_filename = /etc/mysql/encryption/keyfile


Note that the loose option prefix is specified. This option prefix is used in case the plugin hasn’t been installed yet.


The File Key Management plugin currently supports two encryption algorithms for encrypting data: AES_CBC and AES_CTR. Both of these algorithms use Advanced Encryption Standard (AES) in different modes. AES uses 128-bit blocks, and supports 128-bit, 192-bit, and 256-bit keys. The modes are:

  • The AES_CBC mode uses AES in the Cipher Block Chaining (CBC) mode.
  • The AES_CTR mode uses AES in two slightly different modes in different contexts. When encrypting tablespace pages (such as pages in InnoDB, XtraDB, and Aria tables), it uses AES in the Counter (CTR) mode. When encrypting temporary files (where the cipher text is allowed to be larger than the plain text), it uses AES in the authenticated Galois/Counter Mode (GCM).

The recommended algorithm is AES_CTR, but this algorithm is only available when MariaDB is built with recent versions of OpenSSL. If the server is built with wolfSSL or yaSSL, then this algorithm is not available. See TLS and Cryptography Libraries Used by MariaDB for more information about which libraries are used on which platforms.

SHOW WARNINGS;
+---------+------+---------------------------------------------------------------------+
| Level   | Code | Message                                                             |
+---------+------+---------------------------------------------------------------------+
| Warning |  140 | InnoDB: ENCRYPTION_KEY_ID 500 not available                         |
| Error   | 1005 | Can't create table `db1`.`tab3` (errno: 140 "Wrong create options") |
| Warning | 1030 | Got error 140 "Wrong create options" from storage engine InnoDB     |
+---------+------+---------------------------------------------------------------------+
3 rows in set (0.00 sec)

see also https://severalnines.com/blog/exploring-different-ways-encrypt-your-mariadb-data

Posted in Boulot0 commentaire

Forum des métiers du numérique

A l’occasion du forum des métier du numérique qui se tiendra à Saint-Malo le samedi 7 mars 2049, j’ai dépoussiéré ce vieil article d’il y a 3 ans : http://www.laurentmarot.fr/wordpress/?p=3737

D’ailleurs, il est grand temps que j’y aille 🙂

Forum IUT Saint Malo 2019

Forum IUT Saint Malo 2019

Posted in Inclassable1 Commentaire