Install MySQL Server
sudo apt-get install mysql-serverDuring the installation process, you will be prompted to set a password for the MySQL root user as shown below. Choose a strong password and keep it in a safe place for future reference (Why not usin KeePass ?).
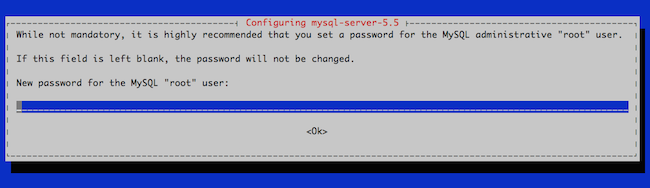
mysql-rootpw-debian
MySQL will bind to localhost (127.0.0.1) by default. Then you can connect locally on to your databases.
Allowing unrestricted access to MySQL on a public IP is not advised, but you may change the address it listens on by modifying the bind-address parameter in /etc/my.cnf. If you decide to bind MySQL to your public IP, you should implement firewall rules that only allow connections from specific IP addresses and then you’ll be able to connect using SSH from another computer.
Harden MySQL Server
It’s also a good thing to harden you database server. Fo taht, run the mysql_secure_installation script to address several security concerns in a default MySQL installation.
sudo mysql_secure_installationYou will be given the choice to :
- change the MySQL root password;
- remove anonymous user accounts;
- disable root logins outside of localhost,
- and remove test databases.
It is recommended that you answer yes to these options.
You can read more about the script in the MySQL Reference Manual.
Using MySQL
The standard tool for interacting with MySQL is the mysql client which installs with the mysql-server package. The MySQL client is used through a terminal. In a very firts time, it’s definitely bad thing to use web GUI to discover mysql functionalities.
Logging as root
- To log in to MySQL as the root user:
mysql -u root -p - When prompted, enter the root password.You’ll then be presented with a welcome header and the MySQL prompt as shown below:
mysql> - To generate a list of commands for the MySQL prompt, enter
\h. You’ll then see:List of all MySQL commands: Note that all text commands must be first on line and end with ';' ? (\?) Synonym for `help'. clear (\c) Clear command. connect (\r) Reconnect to the server. Optional arguments are db and host. delimiter (\d) Set statement delimiter. NOTE: Takes the rest of the line as new delimiter. edit (\e) Edit command with $EDITOR. ego (\G) Send command to mysql server, display result vertically. exit (\q) Exit mysql. Same as quit. go (\g) Send command to mysql server. help (\h) Display this help. nopager (\n) Disable pager, print to stdout. notee (\t) Don't write into outfile. pager (\P) Set PAGER [to_pager]. Print the query results via PAGER. print (\p) Print current command. prompt (\R) Change your mysql prompt. quit (\q) Quit mysql. rehash (\#) Rebuild completion hash. source (\.) Execute an SQL script file. Takes a file name as an argument. status (\s) Get status information from the server. system (\!) Execute a system shell command. tee (\T) Set outfile [to_outfile]. Append everything into given outfile. use (\u) Use another database. Takes database name as argument. charset (\C) Switch to another charset. Might be needed for processing binlog with multi-byte charsets. warnings (\W) Show warnings after every statement. nowarning (\w) Don't show warnings after every statement. For server side help, type 'help contents' mysql>
Create a New MySQL User and Database
- In the example below,
testdbis the name of the database,testuseris the user, andpasswordis the user’s password.create database testdb; create user 'testuser'@'localhost' identified by 'password'; grant all on testdb.* to 'testuser';You can shorten this process by creating the user while assigning database permissions:
create database testdb; grant all on testdb.* to 'testuser' identified by 'password'; - Then exit MySQL.
exit
Create a Sample Table
- Log back in as
testuser.mysql -u testuser -p - Create a sample table called
customers. This creates a table with a customer ID field of the typeINTfor integer (auto-incremented for new records, used as the primary key), as well as two fields for storing the customer’s name.use testdb; create table customers (customer_id INT NOT NULL AUTO_INCREMENT PRIMARY KEY, first_name TEXT, last_name TEXT); - Then exit MySQL.
exit
Reset the MySQL Root Password
If you forget your root MySQL password, it can be reset.
- Stop the current MySQL server instance.
sudo systemctl stop mysql.serivce - Use dpkg to re-run the configuration process MySQL goes through on first installation. You will again be asked to set a root password.
sudo dpkg-reconfigure mysql-server-5.5
dpkg will restart MySQL automatically and you’ll now be able to log in again using mysql -u root -p.
Tune MySQL
MySQL Tuner is a Perl script that connects to a running instance of MySQL and provides configuration recommendations based on workload. Ideally, the MySQL instance should have been operating for at least 24 hours before running the tuner. The longer the instance has been running, the better advice MySQL Tuner will give.
- Install MySQL Tuner from Ubuntu’s repositories.
sudo apt-get install mysqltuner - To run it:
mysqltunerYou will be asked for the MySQL root user’s name and password. The output will show two areas of interest: General recommendations and Variables to adjust.
MySQL Tuner is an excellent starting point to optimize a MySQL server but it would be prudent to perform additional research for configurations tailored to the application(s) utilizing MySQL on your Linode.
More Information
You may wish to consult the following resources for additional information on this topic. While these are provided in the hope that they will be useful, please note that we cannot vouch for the accuracy or timeliness of externally hosted materials.
